代理服务器英文全称是Proxy Server,其功能就是代理网络用户去取得网络信息,同时缓存取得的数据,当再次访问这个页面时,就可以直接从缓存中读取,可以显著的加快网页加载速度,提高上网体验。
一、Squid介绍
Squid cache(简称为Squid)是一个流行的自由软件(GNU通用公共许可证)的代理服务器和Web缓存服务器。Squid有广泛的用途,从作为网页服务器的前置cache服务器缓存相关请求来提高Web服务器的速度,到为一组人共享网络资源而缓存万维网,域名系统和其他网络搜索,到通过过滤流量帮助网络安全,到局域网通过代理上网。Squid主要设计用于在Unix一类系统运行。
Squid的发展历史相当悠久,功能也相当完善。除了HTTP外,对于FTP与HTTPS的支援也相当好,在3.0 测试版中也支援了IPv6。
可以看出,Squid是一款流行的代理软件,当客户端发出HTTP请求时,代理服务器可以代理客户端向目标网站发出请求,就返回信息发送给客户端,同时将信息存储下来。代理服务器还可以共享网络资源,在同一局域网的客户端,可以通过一台连接WWW的代理服务器来访问互联网。下面介绍下如何安装和配置Squid代理服务器。
二、安装Squid。
系统环境:
Linux centos-server 3.10.0-327.10.1.el7.x86_64 GNU/Linux
1、检查是否安装Squid
[root@localhost ~]# rpm -q squid
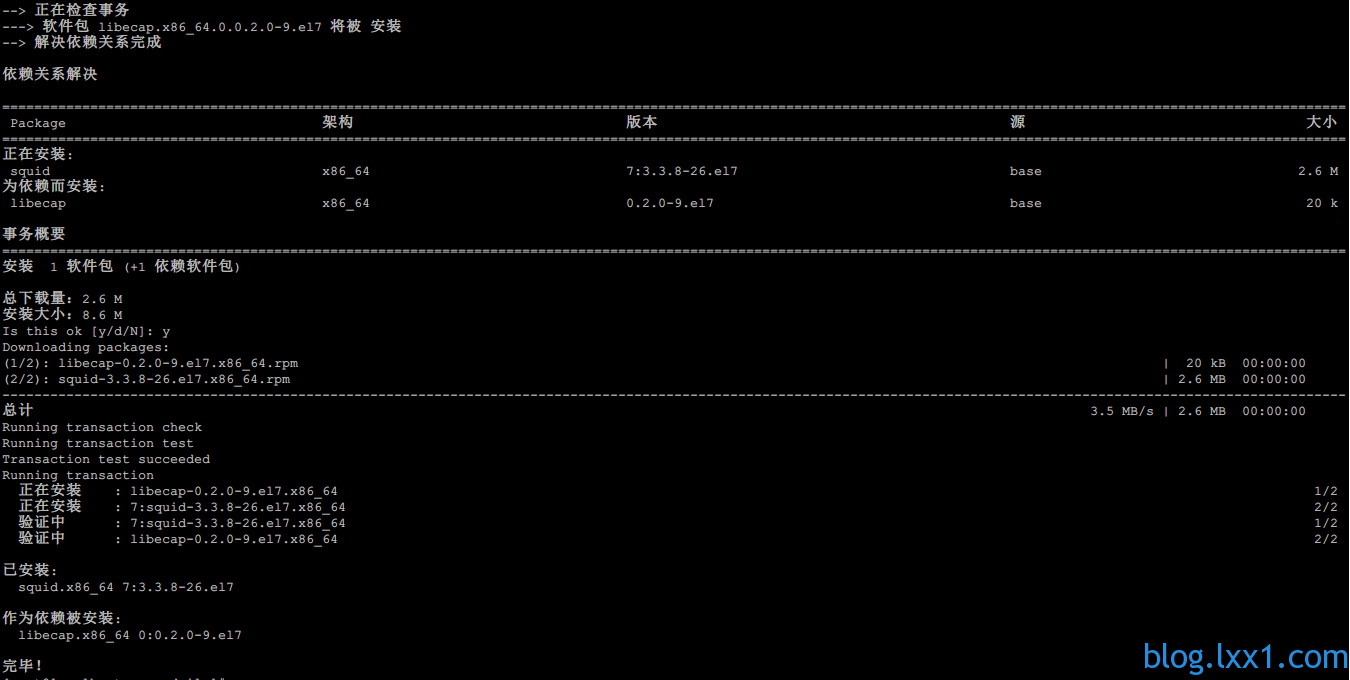
2、如果未安装,使用YUM 安装
[root@localhost ~]#yum -y install squid
3、设置开机启动
[root@localhost ~]# chkconfig squid on
注意:正在将请求转发到“systemctl enable squid.service”。
Created symlink from /etc/systemd/system/multi-user.target.wants/squid.service to /usr/lib/systemd/system/squid.service.
三、配置Squid
Squid的配置文件如下,下载链接:https://github.com/xinxingli/conf/blob/master/squid/squid.conf
# Example rule allowing access from your local networks.
# Adapt to list your (internal) IP networks from where browsing
# should be allowed
acl localnet src 10.0.0.0/8 # RFC1918 possible internal network
acl localnet src 172.16.0.0/12 # RFC1918 possible internal network
acl localnet src 192.168.0.0/16 # RFC1918 possible internal network
acl localnet src fc00::/7 # RFC 4193 local private network range
acl localnet src fe80::/10 # RFC 4291 link-local (directly plugged) machines
acl SSL_ports port 443
acl Safe_ports port 80 # http
acl Safe_ports port 21 # ftp
acl Safe_ports port 443 # https
acl Safe_ports port 70 # gopher
acl Safe_ports port 210 # wais
acl Safe_ports port 1025-65535 # unregistered ports
acl Safe_ports port 280 # http-mgmt
acl Safe_ports port 488 # gss-http
acl Safe_ports port 591 # filemaker
acl Safe_ports port 777 # multiling http
acl CONNECT method CONNECT
http_access deny !Safe_ports
# Deny CONNECT to other than secure SSL ports
http_access deny CONNECT !SSL_ports
# Only allow cachemgr access from localhost
http_access allow localhost manager
http_access deny managerhttp_access allow localnet
http_access allow localhost# And finally deny all other access to this proxy
http_access deny allhttp_port 3128
cache_dir ufs /var/spool/squid 1024 16 256
coredump_dir /var/spool/squid
# Add any of your own refresh_pattern entries above these.
refresh_pattern ^ftp: 1440 20% 10080
refresh_pattern ^gopher: 1440 0% 1440
refresh_pattern -i (/cgi-bin/|\?) 0 0% 0
refresh_pattern . 0 20% 4320
四、启动Squid
1、初始化
[root@localhost ~]# squid -z
[root@localhost ~]# 2016/03/12 11:35:10 kid1| Creating missing swap directories
2016/03/12 11:35:10 kid1| /var/spool/squid exists
2016/03/12 11:35:10 kid1| Making directories in /var/spool/squid/00
2016/03/12 11:35:10 kid1| Making directories in /var/spool/squid/01
2016/03/12 11:35:10 kid1| Making directories in /var/spool/squid/02
2016/03/12 11:35:10 kid1| Making directories in /var/spool/squid/03
2016/03/12 11:35:10 kid1| Making directories in /var/spool/squid/04
2016/03/12 11:35:10 kid1| Making directories in /var/spool/squid/05
2016/03/12 11:35:10 kid1| Making directories in /var/spool/squid/06
2016/03/12 11:35:10 kid1| Making directories in /var/spool/squid/07
2016/03/12 11:35:10 kid1| Making directories in /var/spool/squid/08
2016/03/12 11:35:10 kid1| Making directories in /var/spool/squid/09
2016/03/12 11:35:10 kid1| Making directories in /var/spool/squid/0A
2016/03/12 11:35:10 kid1| Making directories in /var/spool/squid/0B
2016/03/12 11:35:10 kid1| Making directories in /var/spool/squid/0C
2016/03/12 11:35:10 kid1| Making directories in /var/spool/squid/0D
2016/03/12 11:35:10 kid1| Making directories in /var/spool/squid/0E
2016/03/12 11:35:10 kid1| Making directories in /var/spool/squid/0F
2、启动Squid
[root@localhost ~]# service squid start
Redirecting to /bin/systemctl start squid.service
五、使用代理服务器
Squid代理服务器已经配置完成,现在来测试一下是否成功配置。
我们打开IE浏览器,依次打开菜单栏 -> 工具 -> Internet 选项 -> 连接 -> 局域网设置 -> 代理服务器,按照以下格式设置。

使用 Fn+F12 调出开发人员工具,随机打开一个网页,例如加载图片较多的淘宝网,查看不适用代理服务器和使用代理服务器的网页加载速度对比。
未使用代理服务器打开网页:

使用代理服务器:

可以看到,使用代理服务器后,打开网页的速度有了质的提高,因为已经将网页中的图片等资源全部缓存下来了!
原创文章,转载请注明: 转载自科技爱好者博客
本文链接地址: Centos下搭建Squid代理服务器详细教程 (https://www.tujing.site/1378)
如果博客对您有帮助,请给我 赞助


楼主 请问你在配置浏览器代理的时候端口号前面的ip 10.12.7.100是为什么 这个ip是你服务器的ip吗? 你的服务器ip与你用浏览器的电脑在同一局域网段吗?
这个ip(10.12.7.100)是Squid代理服务器的地址,你在配置时要填写自己Squid代理服务器的ip地址。
我的服务器ip地址和浏览器电脑是在同一网段的。
不解 如果我的squid是运行在公网可访问的vps呢 貌似是不行的 还有 您的邮箱是不正确的 哈哈。。
公网按理说是一样可以的,这个我没测试。什么邮箱是错的?
就是你在关于你的那个页面留的联系邮箱是错的 admin[adt]tujing.site kejiahz[adt]163.com 发不到。。可以加扣扣不?
你把 [adt] 改成 @ 就好了
qq没登陆过
我也是大四,也是读硬件的之前
你的邮箱也是自己代理的吗?公网不行 我的vps + squid在国外
不是自己代理,用的企业邮箱服务。
公网的我改天试试
对啊 我原意是想通过squid翻墙的。。。
用SS吧,好用
我自己搭了pptp ss以后再说 谷歌浏览器上插件的代理那种要输入服务器ip和端口的 是不是用squid实现的?
应该不是吧,我感觉是SS实现的
我大致浏览了下 是在国外的vps上安装pac来实现在谷歌浏览器上进行代理翻墙的 我周末再试试